
With the Covid-19 travel restrictions likely to lift just in time to do some ski touring and snow camping in Australia this Winter, I figured a quick reference guide for packing might help to send around to friends you’re heading out with.
The first step is determining where you’re going, how long for, what the weather’s likely to be etc. etc. A mid Winter multi-day traverse is obviously going to be quite different to a late Spring overnighter, so I’ve kept the list pretty general and noted where options might exist.
I’m personally a big fan of keeping things as light as possible, which will inform your choices around what gear to buy, as you can literally halve the weight of things like skis, backpacks, tents and sleeping bags with a bit of research. Keep this in mind with everything listed below and aim for a full carrying weight pack of around 15-20kg. If kids are with you, keep their packs around 25% of their bodyweight with bulkier lighter items like sleeping bags and tents.

Most importantly, practice packing and weighing your kit well before your trip and refine any problems before you set out.
Touring Gear
- Touring Skis / Split Board / Snowshoes
- Ski / Snowboard boots
- Climbing skins
- Ski crampons: These clip onto your touring bindings and provide much needed grip on Australia’s omnipresent boilerplate ice.
- Ski strap to lash skis together.
- Ski poles: Extendable are handy for different types of terrain.
- Googles: Low light lenses if you only have one set, bright sun lenses as well if you have two.
- Glacier glasses: Extra dark tint for bright days. Most normal sunglass lenses are inadequate for skiing, but fine for hanging around camp in.
- Avalanche Safety Kit: Transceiver, Shovel and Probe.
- Personal Locator Beacon: 1 per group that will be skiing together. i.e. If the group splits up to ski different zones, each group should have a PLB.
Optional:
- Helmet: Obviously more important if you’re planning to do big, gnarly lines, but not if you’re doing a cruisy flat traverse.
- 20-30lt day pack, although a mid size alpine pack that carries all your gear is ideal and can cinch down small for day trips from base camp.
- Ski pulk sled: Ideal if you’re heading out for a long multi day trip and want to carry the kitchen sink to base camp. Build your own for under $100.
- Boot Crampons & Ice Axe: Essential for some big western faces lines to get back out.
- GPS if you’re planning to try and navigate in a white out.
- Satellite messenger, e.g. Garmin Inreach, Spot, although most peaks in the main range have good reception.
General Equipment

- Headlamp
- Spare batteries for headlamp, avalanche beacon etc.
- Pocket knife or multi tool
- Cigarette lighter and waterproof matches.
- BBQ firelighters if planning to have outdoor campfires below the tree line. Yes, this is legal.
- Phone: Turn off when not in use or set to airplane mode to save batteries. Most alpine peaks in the main range have good reception.
- Camera: Often better quality results and longer battery life.
- Power bank: Handy for recharging phone on multi-day trips.
- First aid kit with space blanket or emergency bivy bag and hand warmers.
- Basic repair kit: Gaffer tape, cable ties, wire, pole repair tube.
- General straps to bind things to pack.
- Sunscreen & lip balm
- Water bottles with large mouths to stuff snow in. 1lt Nalgene are ideal.
- Paper map of terrain and manual compass.
- Playing cards and reading books for nighttime entertainment.
Clothing

The key here is layering up and down depending on the temperature and task (e.g. skinning up a steep hill vs hanging around in camp). On longer tours you’ll want to plan how you swap out dirty clothes for cleaner ones and how to dry moist clothes out. This might require putting your gloves, socks and boot liners in your sleeping bag at night, simply wearing them around camp so they dry out from your body heat, or finding a nice patch of sun during the day. Always err on the side of caution when planning for cold weather, as it can easily hit -10ºC at night and be -20ºC with the windchill up high.
- Goretex or similar 20K+ membrane shell jacket and pants.
- Mid to heavy weight down or synthetic puffer jacket depending on season.
- Ski socks x 2 pairs: Wear clean ones under and dirty over at night to dry out.
- Thermal leggings and top (Merino or polypropelene). 2 pairs if wanting clean ones to sleep in on longer trips.
- Light long sleeve top for sun protection if it’s likely to be warm during the day.
- Long sleeve thermal top or light polar fleece mid layer.
- Sun hat or cap
- Buff: Preferable to thick neck warmers or balaclavas, as they provide both sun and wind protection.
- Beanie
- Insulated Gloves
- Light Gloves – Polar fleece or lighter material to wear while skinning and in camp.
Optional:
- Polar fleece track pants to wear at night. Alternatively, wear two pairs of thermals.
- Down camp booties: To save weight you can wear your ski boot liners around camp with a strap at the top. This will also help dry them out after a day of skinning.
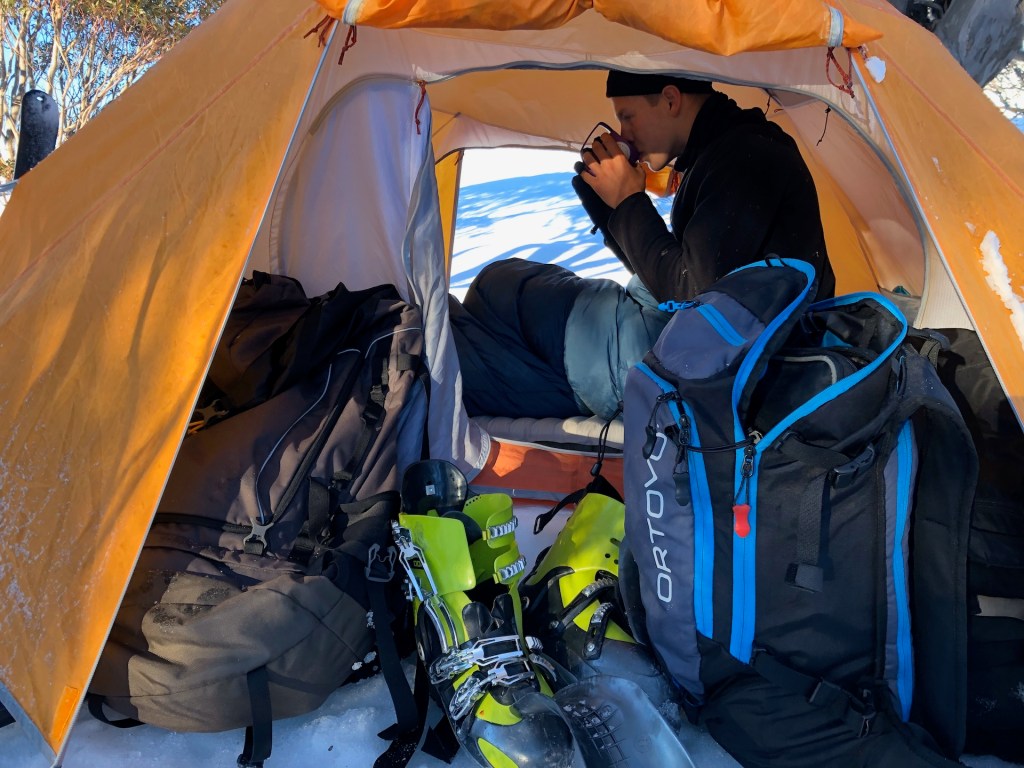
Camping Gear
I could write an individual post on most items here, but you’ll generally find you start off by using regular hiking gear and then upgrading to more specialised alpine gear over time. Don’t stress too much if you don’t have exactly what you need from day one.
- ~50+ litre alpine backpack. These will have the correct straps for carrying skis on the side and be narrower and balanced for when you’re skiing and be able to cinch down smaller for day trips from base camp. The bigger the pack, the more junk you’re likely to bring.
- 4 season alpine tent that can withstand strong winds and snow loading.
- Foam underlay sleeping mat. You can spend $100 on a fancy Thermarest version or $10 on a Kmart one. Both do the same job of keeping the cold from your inflatable mat and for use as a camp seat pad. A half length mat is often ideal.
- Insulated inflatable sleeping mat with a high “R” value. e.g. Thermarest X-Therm or Exped Downmat.
- 4 Season down sleeping bag: Choose one that has a comfort rating of around -10°c “Comfort” rating and -15°c “Limit” rating. The “Extreme” ratings on these bags will be well under -20°c.
- Gear stuff and compression sacks: Often standard sleeping bag and tent storage bags are overly bulky for packing small.
- Jetboil stove or equivalent cooking stove.
- Alpine rated gas canisters or stove fuel. You’ll need a lot more fuel than normal hikes to melt snow for drinking water. 100gm of canned gas per two people per day is a general guide.
- Fork/spork
- Lightweight mug
- Large neck opening pee bottle for night time use: Flexible Nalgene bags are perfect for this. Make sure it’s marked clearly!
- Poop tube for solid waste storage.
- Plastic bags and toilet paper for pooing.
- Disinfectant hand and face wipes.
Optional:
- Sleeping bag liner. Possibly if your main sleeping bag has a weaker “Limit” rating, but not necessary for proper 4 season bags, especially if you have more layers you can put on to sleep in.
- Pyramid tent for cooking area. These weigh around 1kg and can be erected with a ski pole, providing a lot of warmth for a common area. Some people even sleep inside them instead of lugging a full tent.
Food
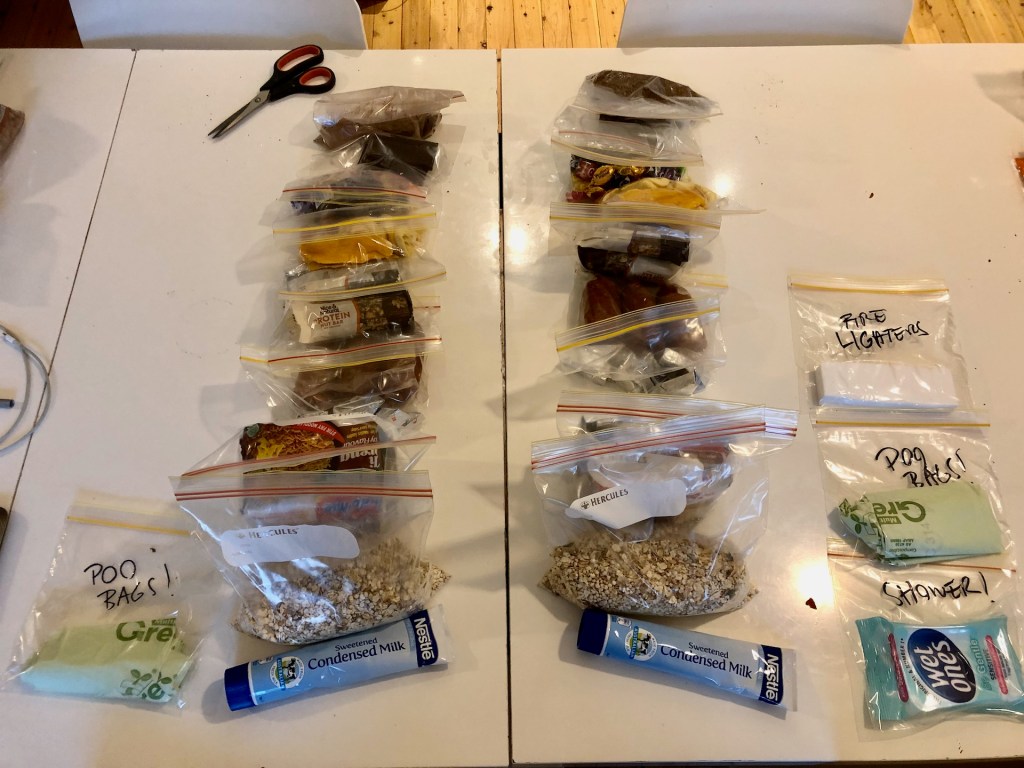
Food planning is critical, especially on longer trips, so I usually plan out how many meals we need over the course of a number of days and then pack each person’s food into carefully allocated portions. Using a Jetboil with freeze dried meals has revolutionised camp cooking, as you’re only ever boiling water with no messy clean ups.
- Breakfast: Instant porridge, nuts, dried fruit, coffee, tea, hot chocolate/milo, freeze dried meals.
- Lunch: Flat bread/wraps, cheese spread (for flavour), salami, cuppa soup, 2 min noodles.
- Dinner: Freeze dried meal, sweet snack dessert.
- Snacks: Nut bars, energy bars, nuts, dark chocolate, lollies, instant miso soup.
- Other: Spices, sweetened condensed milk tubes.
- Choose high energy foods with fat, protein, sugar and high carbs.
- Buy meals that just need hot water added from a jetboil – avoid needing to cook ingredients together.
- Low weight foods – i.e. 2 min noodles instead of canned soup.
- Low packaging – remove all excess packaging before trip. e.g. Put all snack bars without wrappers in a sandwich bag.
